I’m getting more ideas for our wedding decor for our reception at the Glen Manor House in Portsmouth, RI which is only 9 months away! (Coming up in November 2012)
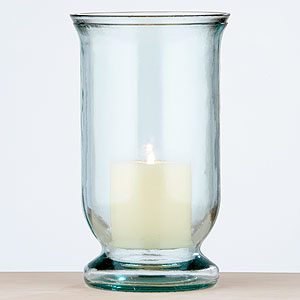
I love flowers very much, but I’m trying to keep things practical for the wedding. I love DIY wedding decorations and thought this idea might be nice. Instead of decking out the manor in large tall floral arrangements, I have decided to have the centerpieces be large recycled glass hurricane globes with beeswax pillar candles inside. Around the base of the hurricane globe, I want to put little tealights (also in recycled glass holders) and have some rose petals scattered lightly around the center of the table.
The best parts about this concept is that we can keep the costs down and keep it a little more green, all while making the Gilded Age style mansion even more beautiful with twinkling candlelit tables and fireplace mantles. This historic manor is so richly decorated that it doesn’t need much added to it, and thus we can get away with a bit less.
Checkout some of these links for where you can purchase recycled glass hurricane globes, votive & tea light holders. I have also provided links for you to purchase your own 100% beeswax candles with cotton wicks – much healthier for the air than those paraffin wax candles made in China.
1. Recycled glass holders at affordable price (Large one is $14.99).
Visit World Market to see the other recycled glass products and candle holders.
2. Beeswax pillars, tapers, tealights, votives, and more – range in price based on the size of the candle. They are a little more expensive than regular paraffin wax candles but, think of how much you would spend if you had a floral arrangement for your centerpiece? I found that Beelite Candles had reasonable prices of around $11-15 per large pillar.
Happy DIY wedding-planning to all the new crafty brides out there! 🙂


